For about 50 skins you can put all new hand controls on your bike. Grips run anywhere from about $6-15, Grip Glue is usually about $5 per tube and stock levers from your local dealer should run you about $15 each on average. While to some this might seem like a lot of cash, when you consider how good proper ergonomics feel, especially if you are riding around with roached grips and levers, it is worth every penny. There is nothing quite as nice as having proper hand controls on your bike. And remember, when you are out riding, the hand controls are where the vast majority of your feedback is coming from. New grips and levers will give you that new bike feel once again, unless your handlebars are pretzeled. If this is the case you might want to consider new bars when putting on new grips and levers.
New grips have two main benefits. First, new rubber is nice and squishy, which helps protect your hands from handlebar vibration. The softer the grip compound, the squishier the grips. Second, new rubber is nice and tacky. What this means is that your gloves will sort of stick to the grips. With wear and tear on the grips and handling the grips with greasy, dirty hands, the tackiness of the rubber wears off over time.
There are some choices to be made when choosing new grips. There are different styles of grips. The vast majority are either waffle or some sort of nubs, or a mix of the two. There are also grips with ridges to separate your fingers and wings to rest your palms on. I don't recommend the shaped types of grips because it makes it hard to change grip position on the throttle hand. In addition to grip style there are also different compounds ranging from soft to hard. Style and compound are both a matter of personal preference. If you aren't sure what you personal preference is, try a different style and compound each time you change your grips. Eventually you will figure out what works for you.
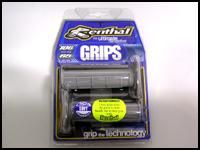
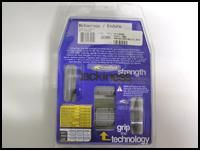
My personal preference is the soft compound, half-waffle Renthal. The reasons that I like this grip are that the nubbed half of the grip gives a smooth surface for my palm and retains its tackiness for a long time, the ribbed (or waffle) portion gives good tactile feel for my fingertips and the combination allows me to use the edge of the waffle pattern as a throttle position sensor for those long, fast straights and sand washes. By sensing the position of the throttle I can hold it close to wide open but still know that I have a little bit of throttle left over in case I need to give it a little extra to clear an obstacle. This is particularly useful in desert riding where cross ruts and small washes are kind of hard to see until you are right on top of them.
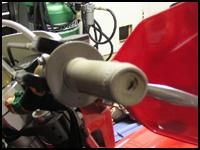
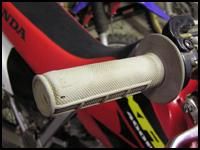
Notice the pinholes and worn down nubs.
The hole in the end of the grip is a sure sign of worn out grip or too many crashes.
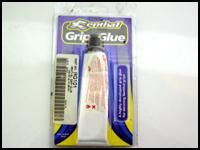
When installing new grips be sure to follow the manufacturer's instructions. Renthal highly suggests that you use their grip glue. I don't know if their grip glue is any different than anybody else's grip glue, but in the interest of safety I'll take their word for it. Be sure to follow the curing instructions on the glue. Most suggest that you leave the grips alone for at least 8 hours after installation to allow the glue to cure. I personally wait 24 hours just to be sure that the glue is properly set.
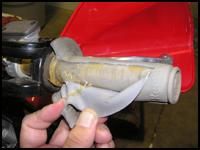
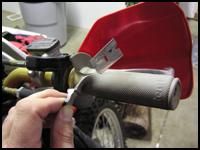
Proper grip removal technique. Be careful not to cut into the throttle tube.
Changing grips on a regular basis will also help you to determine the right amount of glue to use.
When removing your old grips don't give in to the temptation to try and save your old grips. Sure, they have taken you many wonderful and interesting places and they really would look cool on the end of that shovel sitting in the corner…..but grips are cheap, so if you really want to put grips on your hand tools and umbrellas and whatever else you can think of, buy more grips. The easiest way to get those old ragged grips off is to cut them off with a razor blade. You will want to be careful when cutting, especially if you have a plastic throttle tube.
If you are careful, you can remove the large chunks of old glue with a razor blade. The thin film can be easily removed with acetone.
It is much easier to install new grips when working with a clean surface.
Once you have removed the grips you will be faced with the task of removing the old glue. For the big chunks, carefully trim them away with the razor blade. For the thin film that is left on the throttle tube and handlebar, a clean rag and plenty of acetone will do quite nicely at loosening up the old goo. Taking a little extra time here will make the installation of the new grips that much easier. The new glue will also set better on a clean, smooth surface, so for best results get as much of that old glue off as possible.
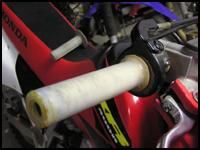
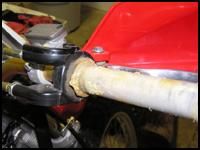
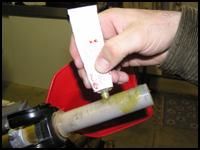
The 70's are over. Follow manufacturer's instructions and use grip glue.
Even if you don't use Renthal grips, read the back of their package - everything you ever needed to know about different grip patterns and compounds.
When applying glue for the new grips you will want to put the majority of the glue on the end of the handlebar or throttle tube and just a bit inside of the new grip. When installing the grip you will find that it is possible to stretch the lip of the grip over the glue, which forces the glue under the grip. As you slide the grip over the bar or throttle tube the glue is spread evenly, and if you do it right the glue actually acts as a lubricant and makes it easier to slide the grip on. You will also want to install the grip opposite of its final position. Once the grip is all of the way onto the handlebar or throttle tube, give it a half twist to help spread the glue around the inner grip surface. You will want to do this fairly quickly as the glue can begin to set fairly quickly.
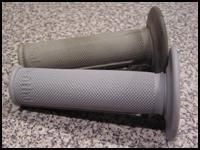
The difference between old and new is obvious.
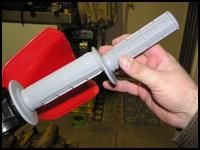
The instructions say to put glue on handlebar and inside of grips. I find that by putting most of the glue on the handlebar it helps to keep glue from getting into the throttle tube assembly.
Another benefit to using softer grip compounds is that they are easier to stretch over the glue that you have placed on the handlebar or throttle tube.
A little dab in the grip end
Follow grip manufacturer's instructions when choosing a grip glue.
Now you need to decide whether you are willing to trust the grip glue or not. I have found that grip glue loses its grip over time, especially if you are riding in different temperature extremes. To ensure my safety, I use the old safety wire on the grip trick. Many grips have grooves cut into them that are intended to act as channels for safety wire. Even if your grips don't have safety wire channels, you won't notice the safety wire if it is properly installed.
Remember to slide the grip onto the bar 180 degrees from the final desired orientation. The half turn after you slide the grip on helps spread the glue evenly.
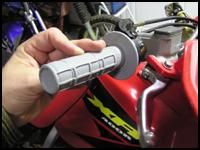
To really finish off the job right, break out the safety wire.
To properly install safety wire on grips you will want to use a stainless wire and you will want to get the wire as tight as possible. Be careful on the throttle tube side. With plastic throttle tubes it is possible to squeeze the tube to the point where it doesn't rotate properly. With a little patience and practice you will figure out just how tight you can go on the throttle side. Once you have the safety wire looped over the grip and twisted, you will want to cut off the excess, leaving a relatively short twisted tail. The tail should be long enough to roll over and push back into the grip surface. I have found that the best method is to roll the tail back into the grip, then take a large pair of pliers and flatten the rolled tail. This will force the sharp end deeper into the rubber and eliminate any bit of the safety wire sticking up and becoming annoying.
Leave enough of a wire tail to allow the tail to be rolled over.
With small needle-nose pliers, roll the wire tail back into the grip rubber.
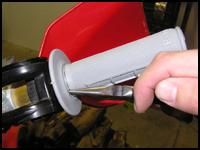
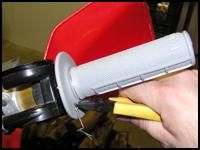
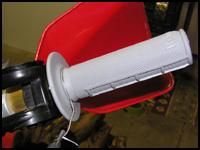
It is very important to make sure that no tails are sticking up or out when safety wiring grips. Not only are you taking the chance of getting holes poked in your fingers, but that bit of wire sticking out will grab your glove at just the wrong time. A proper job of safety wiring will ensure that your grips stay right where you want them and will give you the peace of mind that your grip isn't going to go flying off the end of the handlebar.
At mid grip the tail can be rolled into the ribs of the grip.
With wire tails securely tucked into grip rubber, the end result is a safe and sanitary control surface.
As far as lever replacement is concerned, it usually requires nothing more than removal of a single bolt or screw. You may also have to screw in the lever adjustment knob where the cable enters the lever holder, but once this is accomplished the lever will easily come away from its perch. Once this is accomplished it is a simple task to pull the lever away from the cable and place the new lever in its place. To get slack on the cable it is sometimes necessary to actuate whatever the lever connects to by hand. Because of this you might want to have a helper handy. With new levers in place, torque everything to the recommended settings and you are ready to ride.
[
The real beauty of half-waffle grips is that they give you a tactile way to sense throttle position. This is very helpful on those long, high-speed sections.

Do yourself a favor and replace those old, mangled levers. Stock replacement levers are really not that expensive and can make a big difference to how the bike feels.
You won't have a new bike, but the feeling you get from new controls will remind you what it felt like when the bike was new. Now all that is left for you to do is all of the rest of the maintenance that you have been putting off. The sun will come out and the snow will melt before you know it.