Post by Master Yoda on Aug 29, 2005 18:03:42 GMT -5
Okay you moto bashers... if you ride as hard as you bench race its a good idea to grease that rear linkage once in awhile.
Check your service manual for how often... you know thats the book you threw somewhere when you bought your bike and really didn't bother reading cause it had too many words in it.
Anyhow I know this is showing a Kaw-a-suckie but they all about the same.
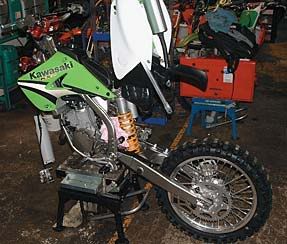
1) With your bike on the stand you can begin the service. The seat is the first part to remove followed by the chain. Remember to keep all your parts and bolts in order so you don't lose any. With your seat and chain off you can then begin to remove the subframe from your weapon. On some bikes you need to remove the tailpipe to get the subframe off but on this one-twenty-five the tailpipe can stay in place.
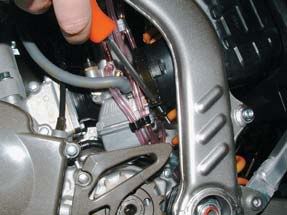
Remove the lower subframe holding bolts and loosen the rear carb clip with the Phillips screwdriver. With the bolts removed and the carb clip loose you then loosen the top subframe bolt. As you can see from the pic I don't completely remove the subframe - this keeps the subframe from being damaged if it's left on the floor. If you have plenty of room and no-one is gonna tread on your parts then whip the subframe off and put it to one side. Make sure you use a clean piece of cloth or paper roll to cover the open part of the carb to stop any crap from getting in there.
2) With the subframe gone the next step is to remove the rear brake system. This makes the job easier as it gets the brake out of the way. When this is removed you can start to loosen all the fixing points on the swingarm and linkage. There are normally five fixing points on most bikes, plus top and bottom shock bolts. Loosen and remove all the nuts on the link and front pivot point on the swingarm as shown. With all the pivots and shock bolts loosened you remove only the shock bolts and slip it out of its place and put somewhere safe (you may have to remove a chain roller to get to all the link bolts).
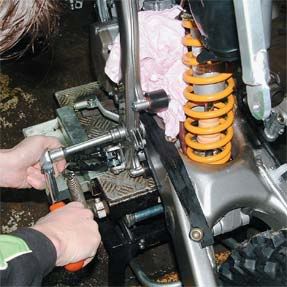
3) Leave all the linkage bolts in place and slide the main pivot out - this allows you to move the swingarm into the position shown. When you have the swingarm in this position you remove the linkage bolt as shown. The swingarm is now disconnected.
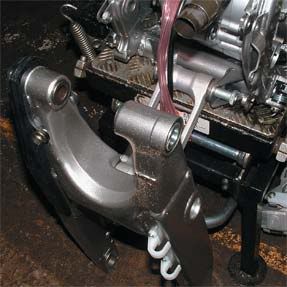
4) Now the swingarm and linkage are removed you can make a neat space on a work surface to lay all your parts in order all ready to grease up.
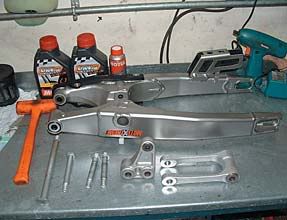
5) The link parts have the bearings inside the caps, seals and collars. Simply pop the caps off from the outside and push the inner collar out from the centre. The roller bearings will be exposed. If there's a lot of crud build up around the seals just ease them out one at a time with a flat blade screwdriver. Clean the seal and the fitting area, grease the seal and push back into position.
When greasing the roller bearing you must make sure to force the grease into the bearing. The grease must be 'packed' into the bearing as this will ensure a solid rebuild. Repeat the greasing on all the pivot points as the pics show, making sure to grease the end caps and seals to keep the water and crud out. Lightly grease all the pivot bolts and wipe off all excess grease from the linkage. When the excess is wiped off you can build the link back onto the swingarm while it is still on the bench, making sure to get the bolt ends re-fitted in the same direction as they were before.
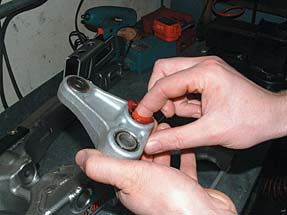
6) The pics show the first part of the pivot being fitted back into the frame. When this first part of the link is fixed in place you then lift the swingarm into position and push the main pivot through and into its place. Fix the nuts onto the pivot bolts at this stage.
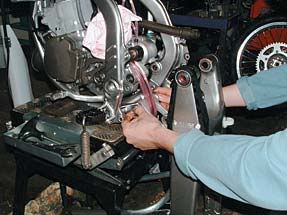
7) The next step on the re-build section is to re-fit the rear shock. The bolts and top shock bearing should be greased before you fit the unit into place. When the shock is in place and all the pivot bolts and nuts are fitted it's time to get them all tightened up. If you have someone who can help you at this stage it makes the job a little easier. Get your pal to hold the bolt end with a spanner or socket while you tighten the nut on the other end. Always tighten the nut side as this gives you the correct torque. Check your manual for the torque settings on each pivot.
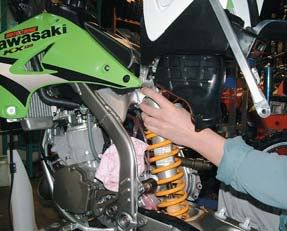
8) With all the pivots fixed in place and tightened up you can now fit your rear brake. A point on a motocross bike which is sometimes forgotten is the brake pivot point. This point is really important to keep lubed to stop any sticking action and excessive wear on the pivot. As the pic shows, just a little grease will keep everything sweet in this department.
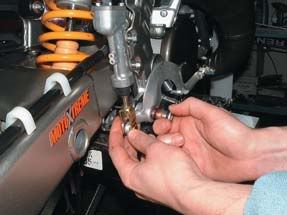
9) The next step is to drop the subframe back into position. A wee tip for you on this is to spray a little bit of carb cleaner or contact cleaner around the rubber boot before you try and fit it onto the rear of the carburettor. This allows the boot to slip on pretty easily. As with the linkage, get all your fixings in place before you tighten anything up. When all your points are fitted and the rubber intake boot is on correctly you can then tighten all your bolts and your intake clip. Fit your tailpipe if you had to remove it.
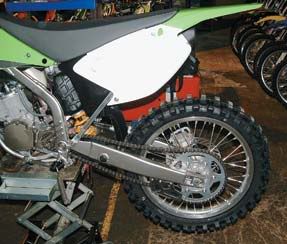
10) Fit your seat, chain and rear wheel and there you have it - your rear end service is complete and you are safe in the knowledge you are running smooth on the rear and you aren't damaging your weapon of choice...
Check your service manual for how often... you know thats the book you threw somewhere when you bought your bike and really didn't bother reading cause it had too many words in it.
Anyhow I know this is showing a Kaw-a-suckie but they all about the same.

1) With your bike on the stand you can begin the service. The seat is the first part to remove followed by the chain. Remember to keep all your parts and bolts in order so you don't lose any. With your seat and chain off you can then begin to remove the subframe from your weapon. On some bikes you need to remove the tailpipe to get the subframe off but on this one-twenty-five the tailpipe can stay in place.
Remove the lower subframe holding bolts and loosen the rear carb clip with the Phillips screwdriver. With the bolts removed and the carb clip loose you then loosen the top subframe bolt. As you can see from the pic I don't completely remove the subframe - this keeps the subframe from being damaged if it's left on the floor. If you have plenty of room and no-one is gonna tread on your parts then whip the subframe off and put it to one side. Make sure you use a clean piece of cloth or paper roll to cover the open part of the carb to stop any crap from getting in there.
2) With the subframe gone the next step is to remove the rear brake system. This makes the job easier as it gets the brake out of the way. When this is removed you can start to loosen all the fixing points on the swingarm and linkage. There are normally five fixing points on most bikes, plus top and bottom shock bolts. Loosen and remove all the nuts on the link and front pivot point on the swingarm as shown. With all the pivots and shock bolts loosened you remove only the shock bolts and slip it out of its place and put somewhere safe (you may have to remove a chain roller to get to all the link bolts).

3) Leave all the linkage bolts in place and slide the main pivot out - this allows you to move the swingarm into the position shown. When you have the swingarm in this position you remove the linkage bolt as shown. The swingarm is now disconnected.

4) Now the swingarm and linkage are removed you can make a neat space on a work surface to lay all your parts in order all ready to grease up.

5) The link parts have the bearings inside the caps, seals and collars. Simply pop the caps off from the outside and push the inner collar out from the centre. The roller bearings will be exposed. If there's a lot of crud build up around the seals just ease them out one at a time with a flat blade screwdriver. Clean the seal and the fitting area, grease the seal and push back into position.
When greasing the roller bearing you must make sure to force the grease into the bearing. The grease must be 'packed' into the bearing as this will ensure a solid rebuild. Repeat the greasing on all the pivot points as the pics show, making sure to grease the end caps and seals to keep the water and crud out. Lightly grease all the pivot bolts and wipe off all excess grease from the linkage. When the excess is wiped off you can build the link back onto the swingarm while it is still on the bench, making sure to get the bolt ends re-fitted in the same direction as they were before.

6) The pics show the first part of the pivot being fitted back into the frame. When this first part of the link is fixed in place you then lift the swingarm into position and push the main pivot through and into its place. Fix the nuts onto the pivot bolts at this stage.

7) The next step on the re-build section is to re-fit the rear shock. The bolts and top shock bearing should be greased before you fit the unit into place. When the shock is in place and all the pivot bolts and nuts are fitted it's time to get them all tightened up. If you have someone who can help you at this stage it makes the job a little easier. Get your pal to hold the bolt end with a spanner or socket while you tighten the nut on the other end. Always tighten the nut side as this gives you the correct torque. Check your manual for the torque settings on each pivot.

8) With all the pivots fixed in place and tightened up you can now fit your rear brake. A point on a motocross bike which is sometimes forgotten is the brake pivot point. This point is really important to keep lubed to stop any sticking action and excessive wear on the pivot. As the pic shows, just a little grease will keep everything sweet in this department.

9) The next step is to drop the subframe back into position. A wee tip for you on this is to spray a little bit of carb cleaner or contact cleaner around the rubber boot before you try and fit it onto the rear of the carburettor. This allows the boot to slip on pretty easily. As with the linkage, get all your fixings in place before you tighten anything up. When all your points are fitted and the rubber intake boot is on correctly you can then tighten all your bolts and your intake clip. Fit your tailpipe if you had to remove it.

10) Fit your seat, chain and rear wheel and there you have it - your rear end service is complete and you are safe in the knowledge you are running smooth on the rear and you aren't damaging your weapon of choice...


